Create Your Identity
Introduction
This page will guide you on how to create your passwordless identity, your organization might require you to have a hardware token if you have not requested a hardware token, please request one.
System Requirements
Currently EZSmartCard is only supported on Windows 10+ and MacOS 12+
Different Onboarding Options
Depending on your organization’s settings, you might have the following identity bootstrapping options:
- Government ID Scan.
- Same Domain or Whitelisted Domain Authentication
- Preloaded Identity with Unblock Pin
Hardware Key Onboarding
The following instructions will guide you on how to onboard your hardware key for passwordless authentication. based on your organization settings, this onboarding might create a FIDO2 key or a SmartCard or both. While this won’t really affect your user experience, you can learn more about the different authentication methods in this webinar.
Government ID Scan
Video Version
Text Version
- Open the EZSmartCard Tool.
- Navigate to “Request Certificate”.
- Select “Government ID Validation”.
- Enter your email.
- Scan the QR code with your phone.
- Follow the instructions on scanning your face and your Government ID.
- Once you finish your ID Validation on the phone, click the “Finished Phone Validation” Button.
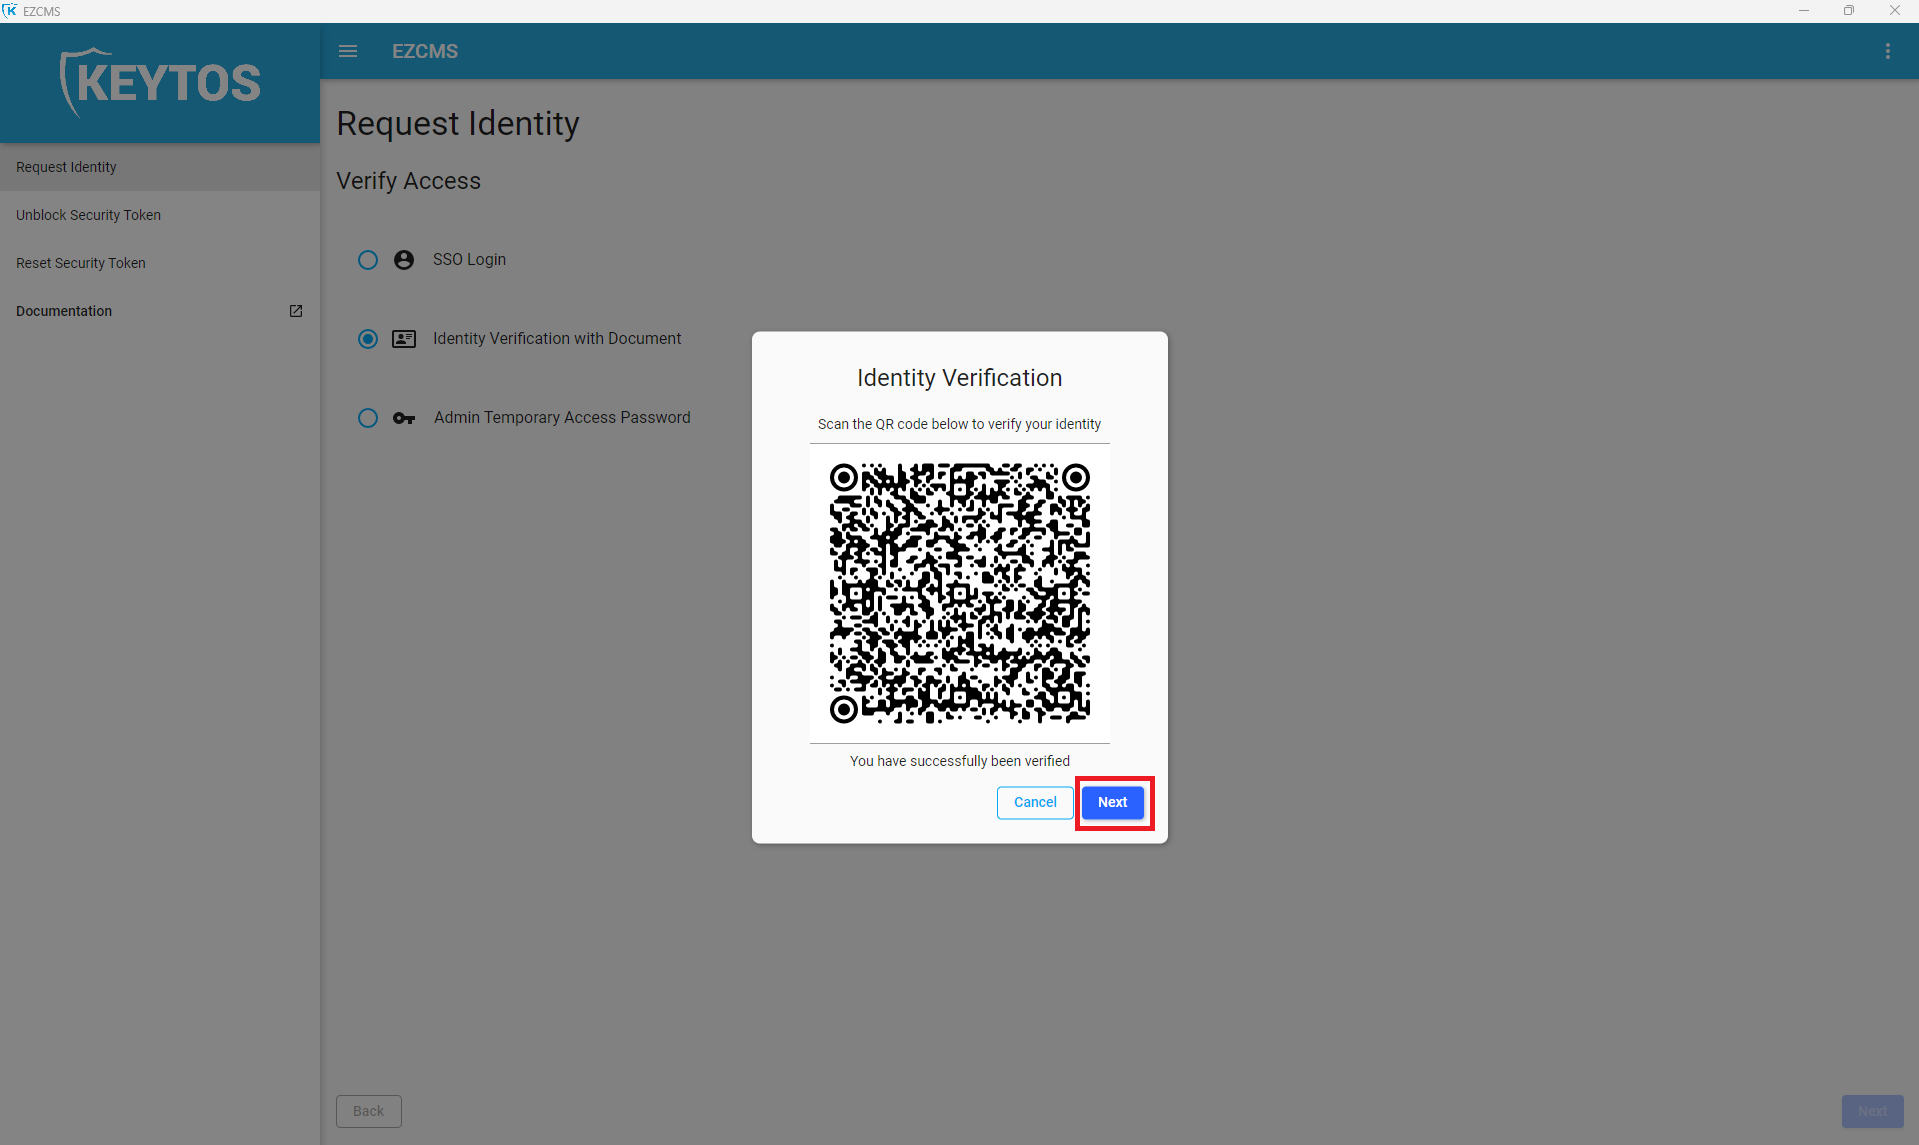
- EZSmartCard will Validate your information (this might take a few minutes).
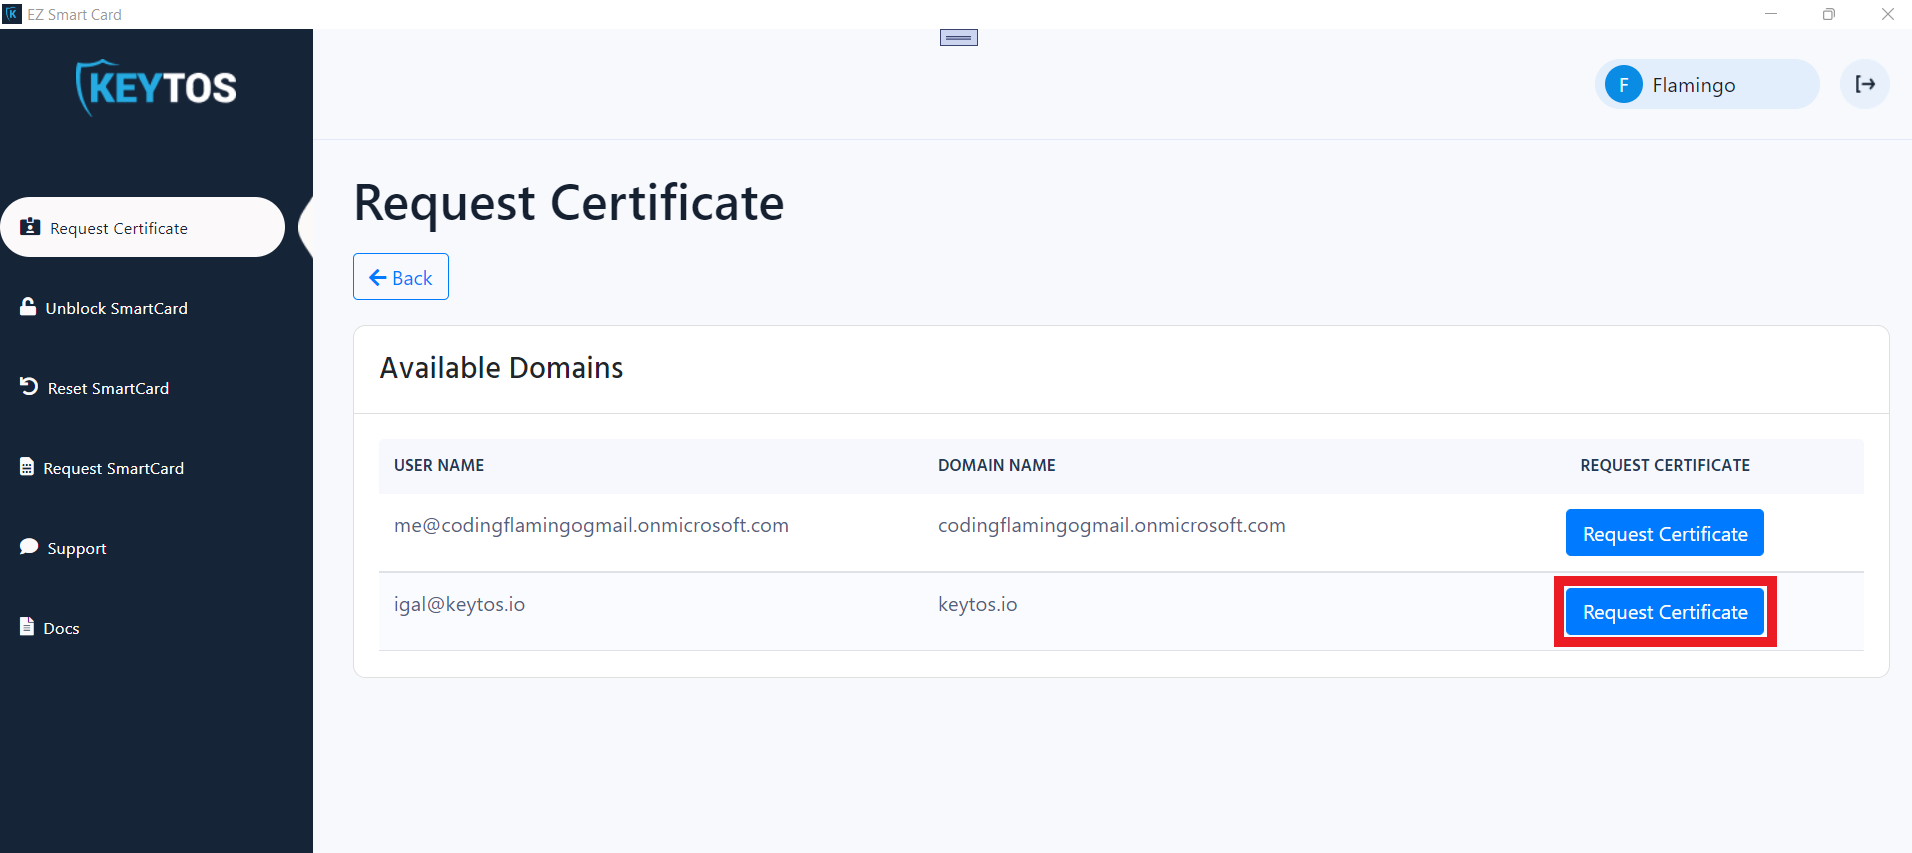
- Select the account you want to create an identity for.
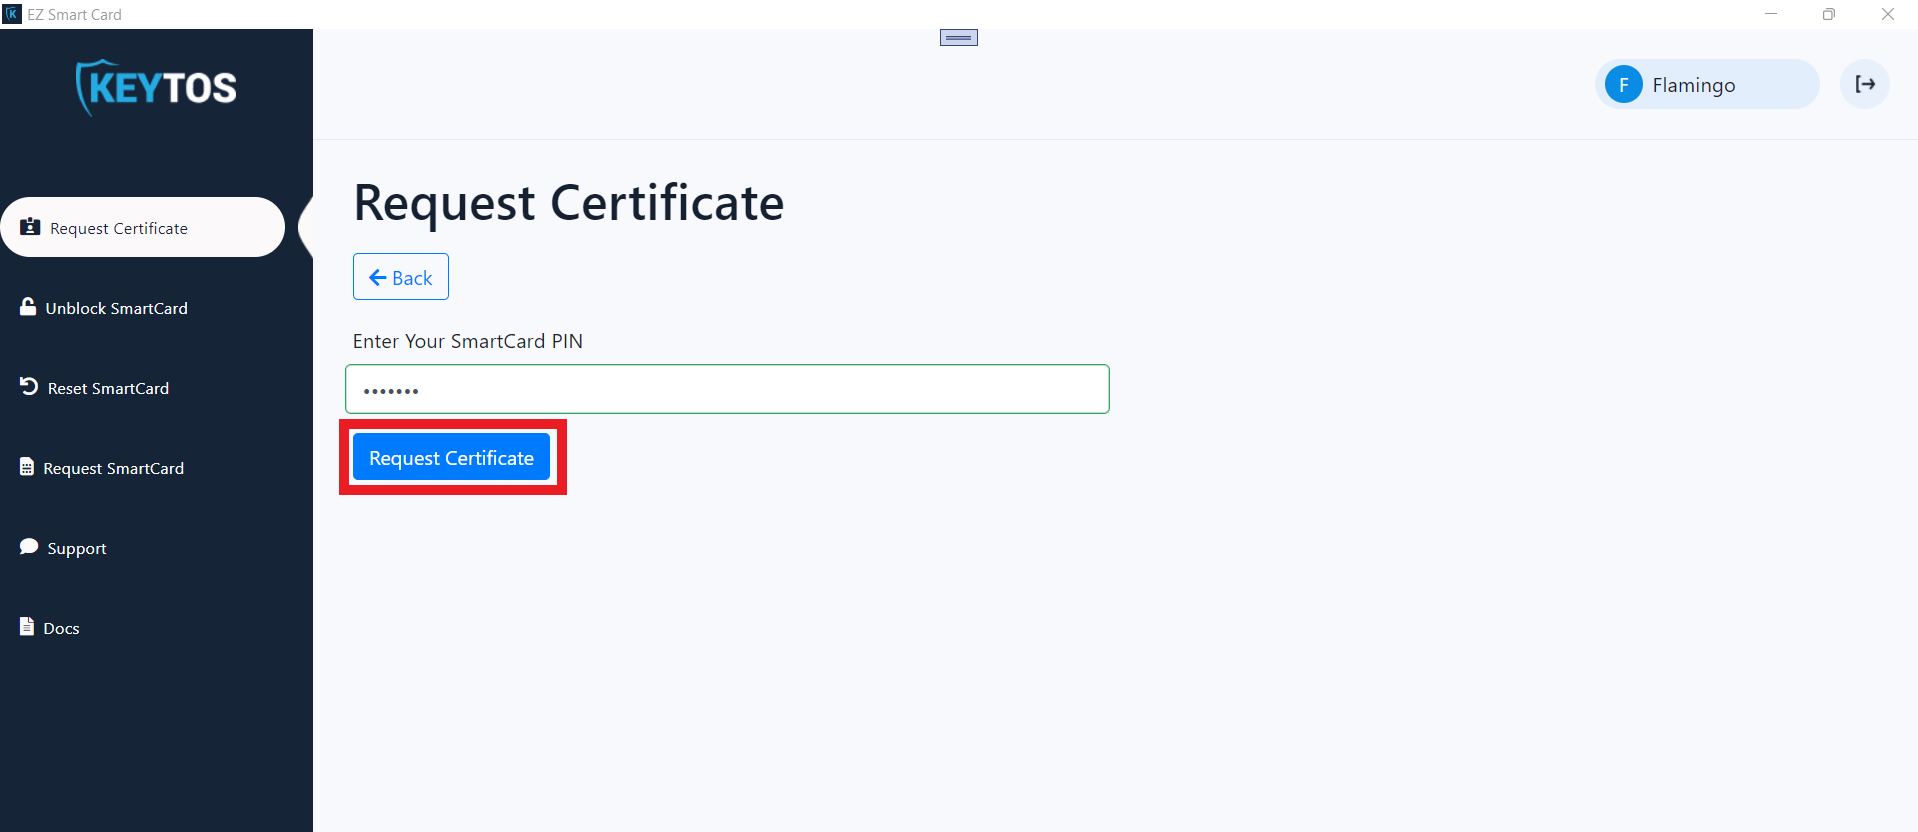
- If is the first time you use this SmartCard, create a new 6-8 characters pin (this pin will be required each time you use your SmartCard).
- If you have already used this SmartCard before, enter your pin.
- Click “Request Certificate”
- If using a Yubikey, the Yubikey might start flashing fast when creating the key and then slowly indicting that it requires a physical touch, when that happens touch the Yubikey on the copper part. This step can occur up to 4 times during key creation.
- Your certificate is now ready to be used
Same Domain or Whitelisted Domain Authentication
Video Version
Text Version
- Open the EZSmartCard Tool.
- Login.
- Navigate to “Request Certificate”.
- Select “Existing User Account”.
- Select the account you want to create an identity for.
- If is the first time you use this SmartCard, create a new 6-8 characters pin (this pin will be required each time you use your SmartCard).
- If you have already used this SmartCard before, enter your pin.
- Click “Request Certificate”
- If using a Yubikey, the Yubikey might start flashing fast when creating the key and then slowly indicting that it requires a physical touch, when that happens touch the Yubikey on the copper part. This step can occur up to 4 times during key creation.
- Your certificate is now ready to be used.
Preloaded Identity with Unblock Pin
Some organizations prefer having the IT Help Desk create the smart card certificate for their user and have the user unblock the smart card. If this is the case for your SmartCard, EZSmartCard will send you an email with your unblocking code, and a link to these instructions. To Unblock the SmartCard Follow the following Steps:
- Open the EZSmartCard Tool.
- Navigate to “Unblock SmartCard”
- Enter your Unblock Pin.
- Create a new 6-8 characters pin (this pin will be required each time you use your SmartCard).
- Click “Unblock SmartCard”
Phone Onboarding
Your organization might have also set up passwordless authentication with phone authentication with the Microsoft authenticator app. Based on your organization setting, you might be able to create this identity either by verifying your identity with a government ID, or with an existing Azure AD account.
Government ID
- Open the EZSmartCard Tool.
- Navigate to “Request Certificate”.
- Select “Government ID Validation”.
- Enter your email.
- Scan the QR code with your phone.
- Follow the instructions on scanning your face and your Government ID.
- Once you finish your ID Validation on the phone, click the “Finished Phone Validation” Button.
- EZSmartCard will Validate your information (this might take a few minutes).
- Select the account you want to create an identity for.
- Click the “Start Phone Enrollment” button.

- If you do not have the Microsoft Authenticator app, use the QR code to download it on your phone, and click next.
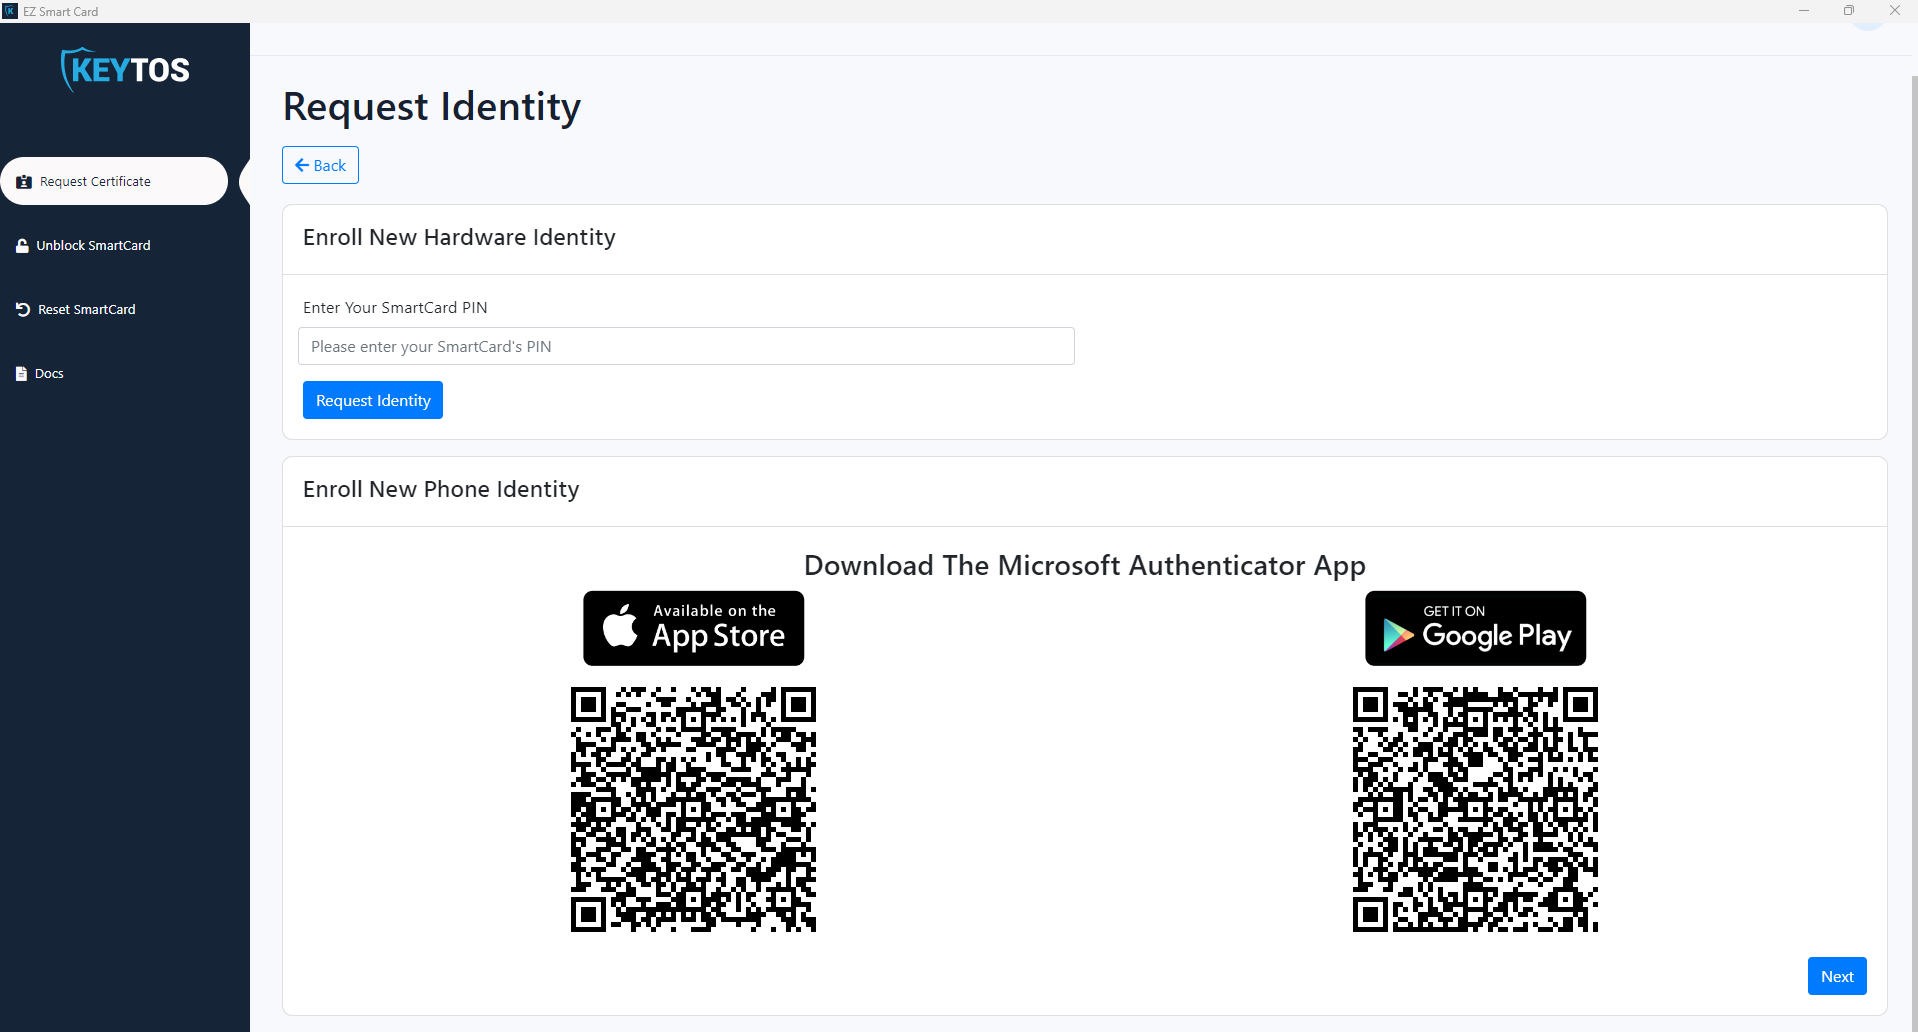
- Now it will show your enrollment QR code, open the Microsoft Authenticator App, click add work or school account and Scan that QR code.

- Once you have scanned the QR Code Click Next
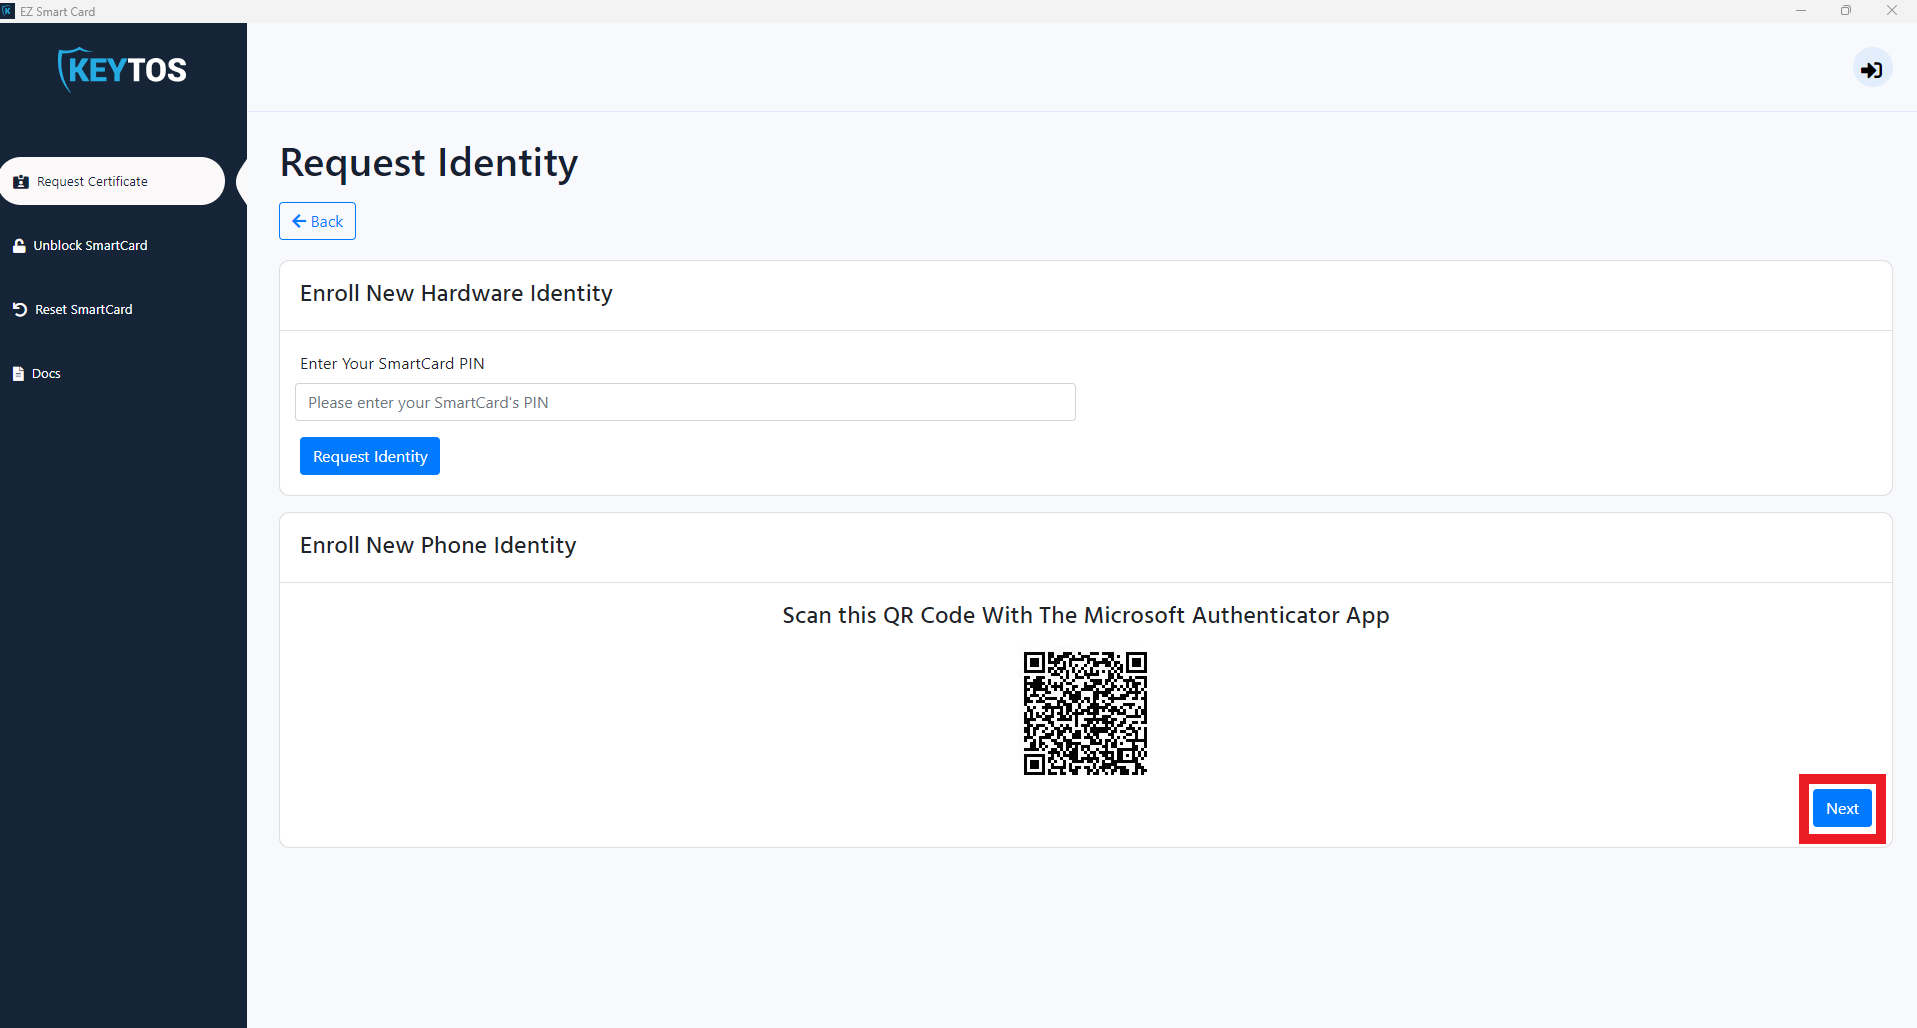
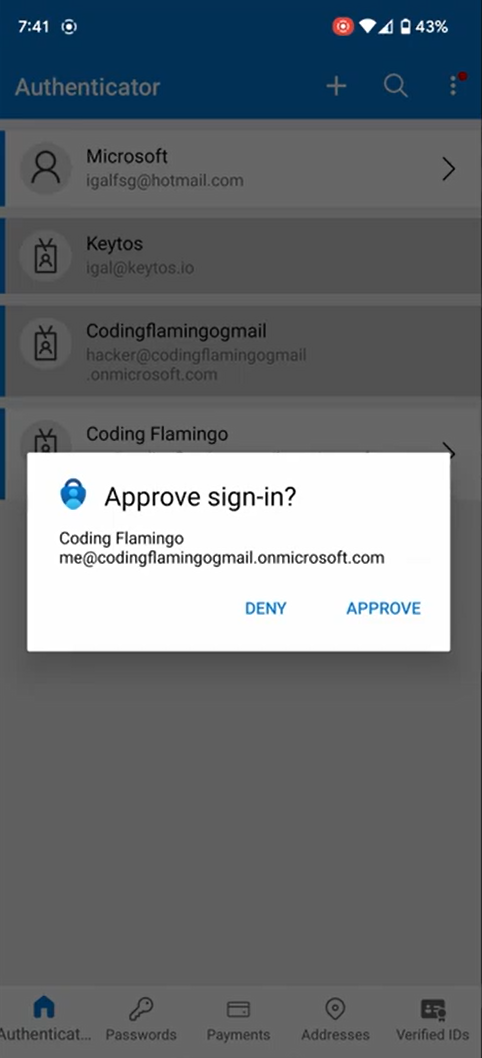
- This will send a test authentication request to your phone, Open your Authenticator app and click approve.
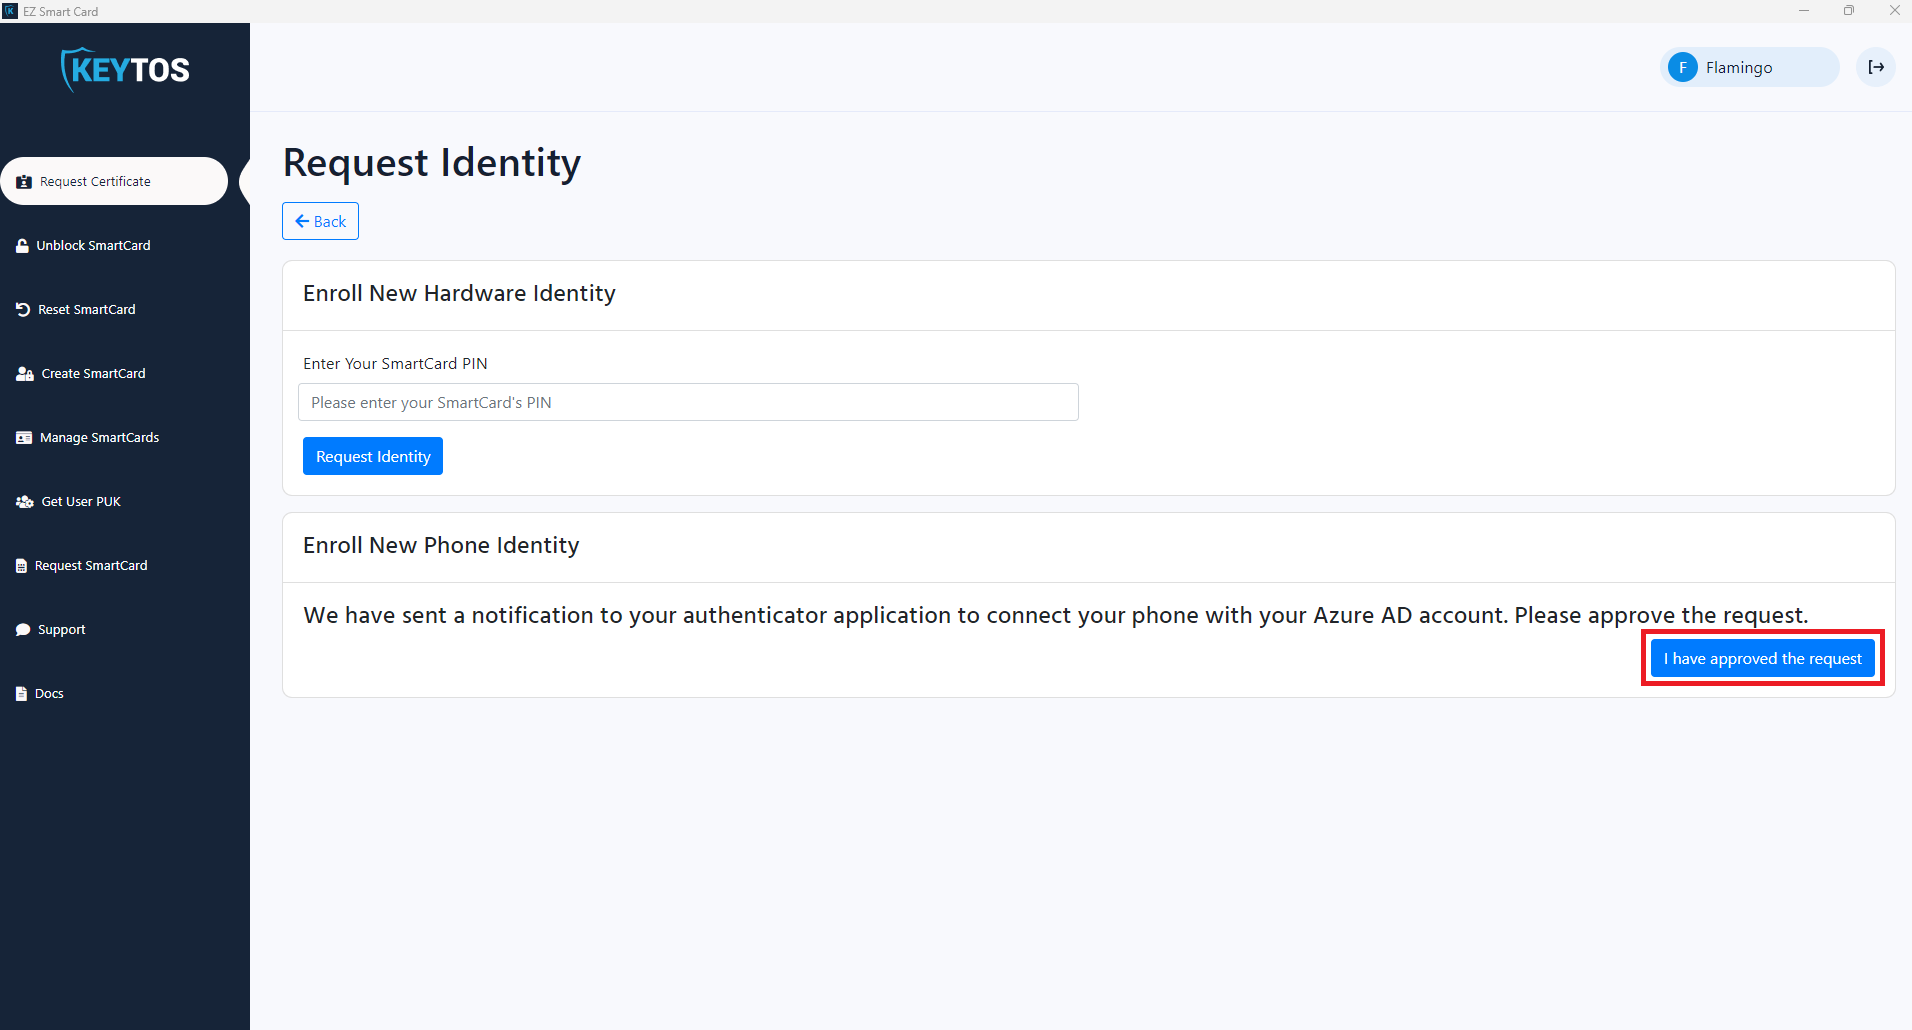
- Once you have approved the request, click the “I have approved the request” button.
- The last step for setting up phone passwordless authentication, is enabling it on the Microsoft Authenticator App.
- Open the authenticator app.
- Select the account you just enrolled.
- Click Continue,
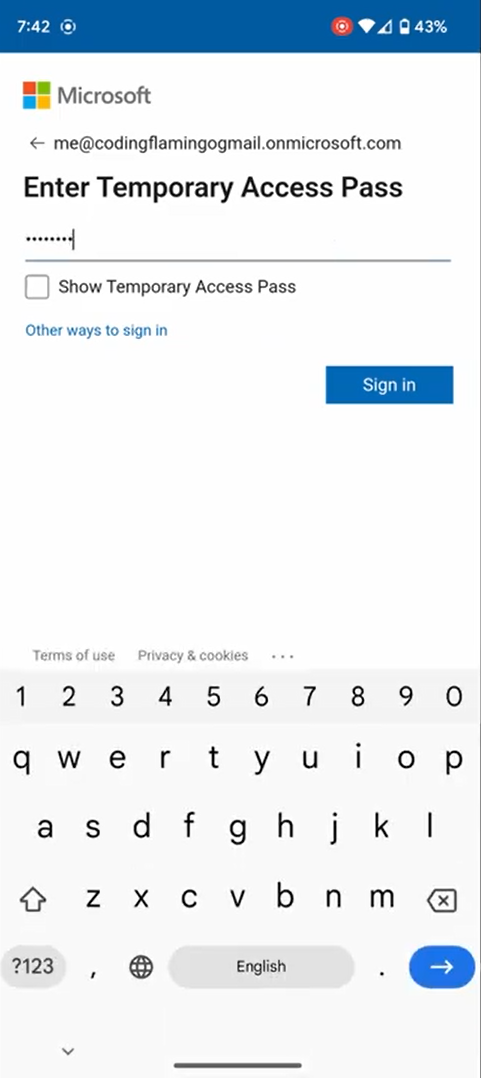
- Get the TAP shown in the EZSmartCard Application.
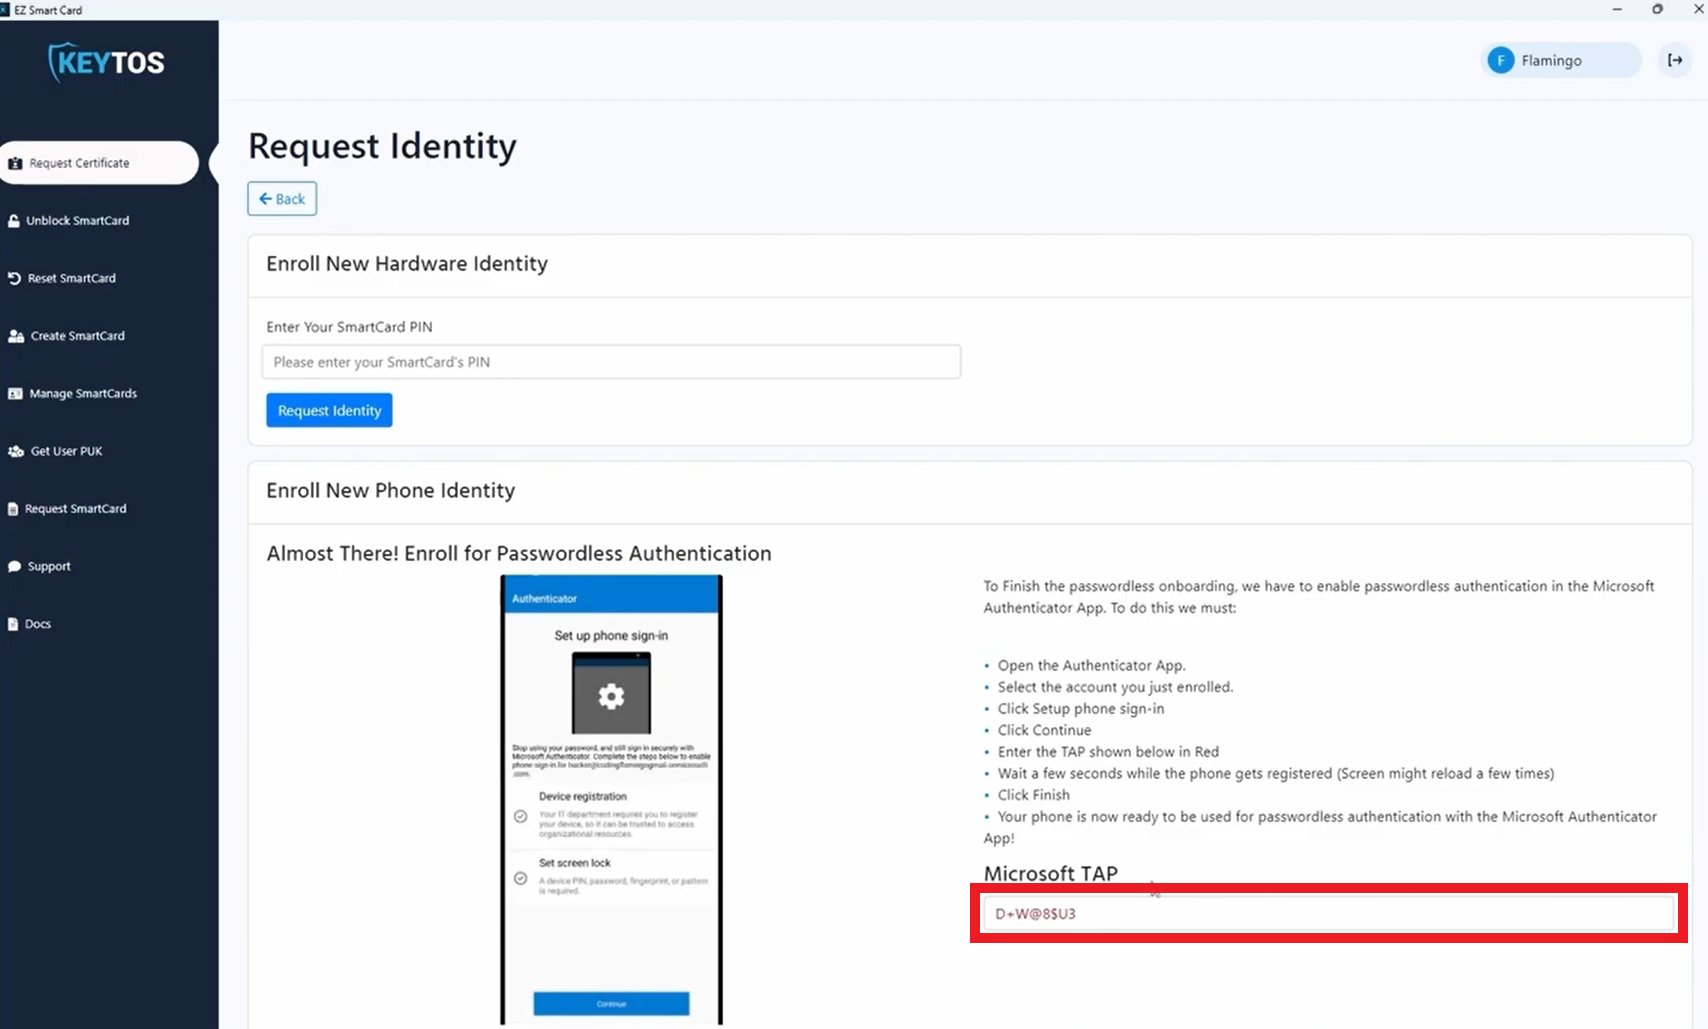
- Enter the TAP shown in the EZSmartCard Application in your authenticator app.
- Wait a few seconds while the phone gets registered. (Screen might reload a few times)
- Click Finish.

Azure AD Authentication
- Open the EZSmartCard Tool.
- Login.
- Navigate to “Request Certificate”.
- Select “Existing User Account”.
- Select the account you want to create an identity for.
- Click the “Start Phone Enrollment” button.
- If you do not have the Microsoft Authenticator app, use the QR code to download it on your phone, and click next.
- Now it will show your enrollment QR code, open the Microsoft Authenticator App, click add work or school account and Scan that QR code.
- Once you have scanned the QR Code Click Next
- This will send a test authentication request to your phone, Open your Authenticator app and click approve.
- Once you have approved the request, click the “I have approved the request” button.
- The last step for setting up phone passwordless authentication, is enabling it on the Microsoft Authenticator App.
- Open the authenticator app.
- Select the account you just enrolled.
- Click Continue,
- Get the TAP shown in the EZSmartCard Application.
- Enter the TAP shown in the EZSmartCard Application in your authenticator app.
- Wait a few seconds while the phone gets registered. (Screen might reload a few times)
- Click Finish.