Keytos Documentation > Passwordless onboarding tool For Azure Unphishable Credentials > Getting Started with EZCMS > How To Setup Remote FIDO2 and CBA Onboarding in Azure
How To Setup Remote FIDO2 and CBA Onboarding in Azure
Prerequisites
How to Enable FIDO2 and Entra CBA Onboarding in Azure Video Version
Creating the Azure Resource
- Go to https://portal.azure.com/
- Click on “Create a resource”.
- Type “EZCMS” in the search bar.
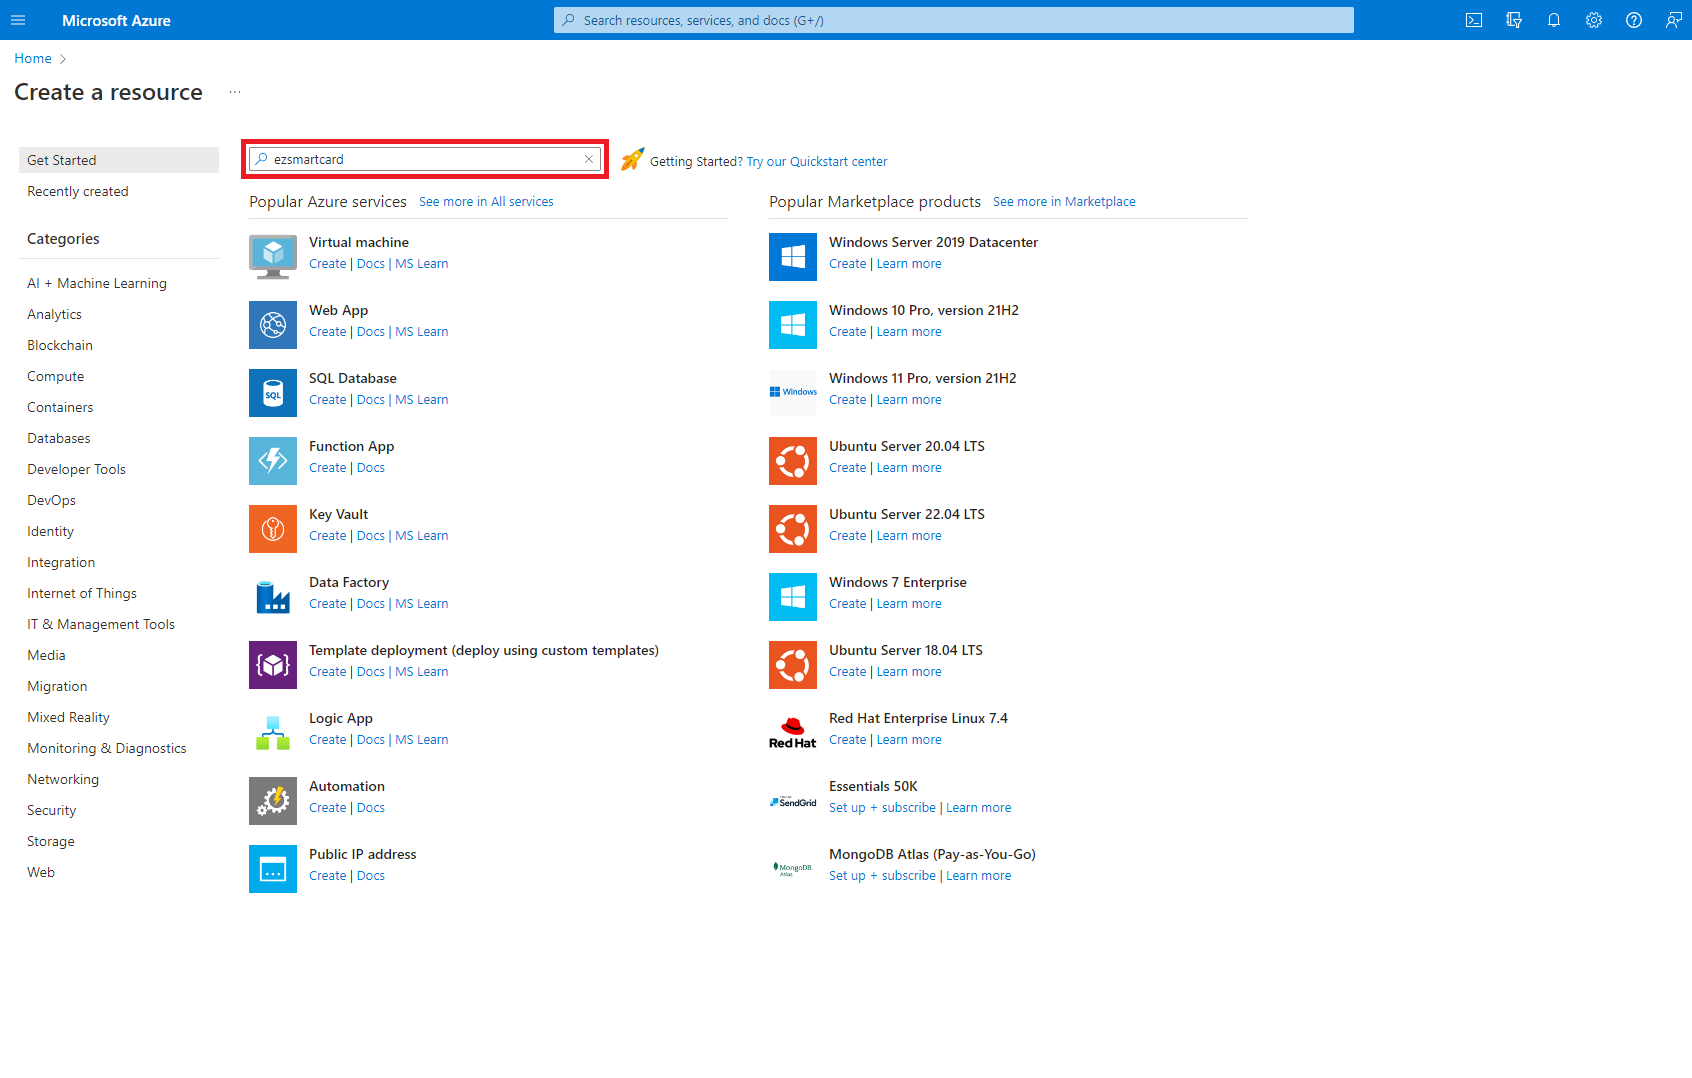
- Press enter.
- Select the EZCMS offering

- Select the plan.
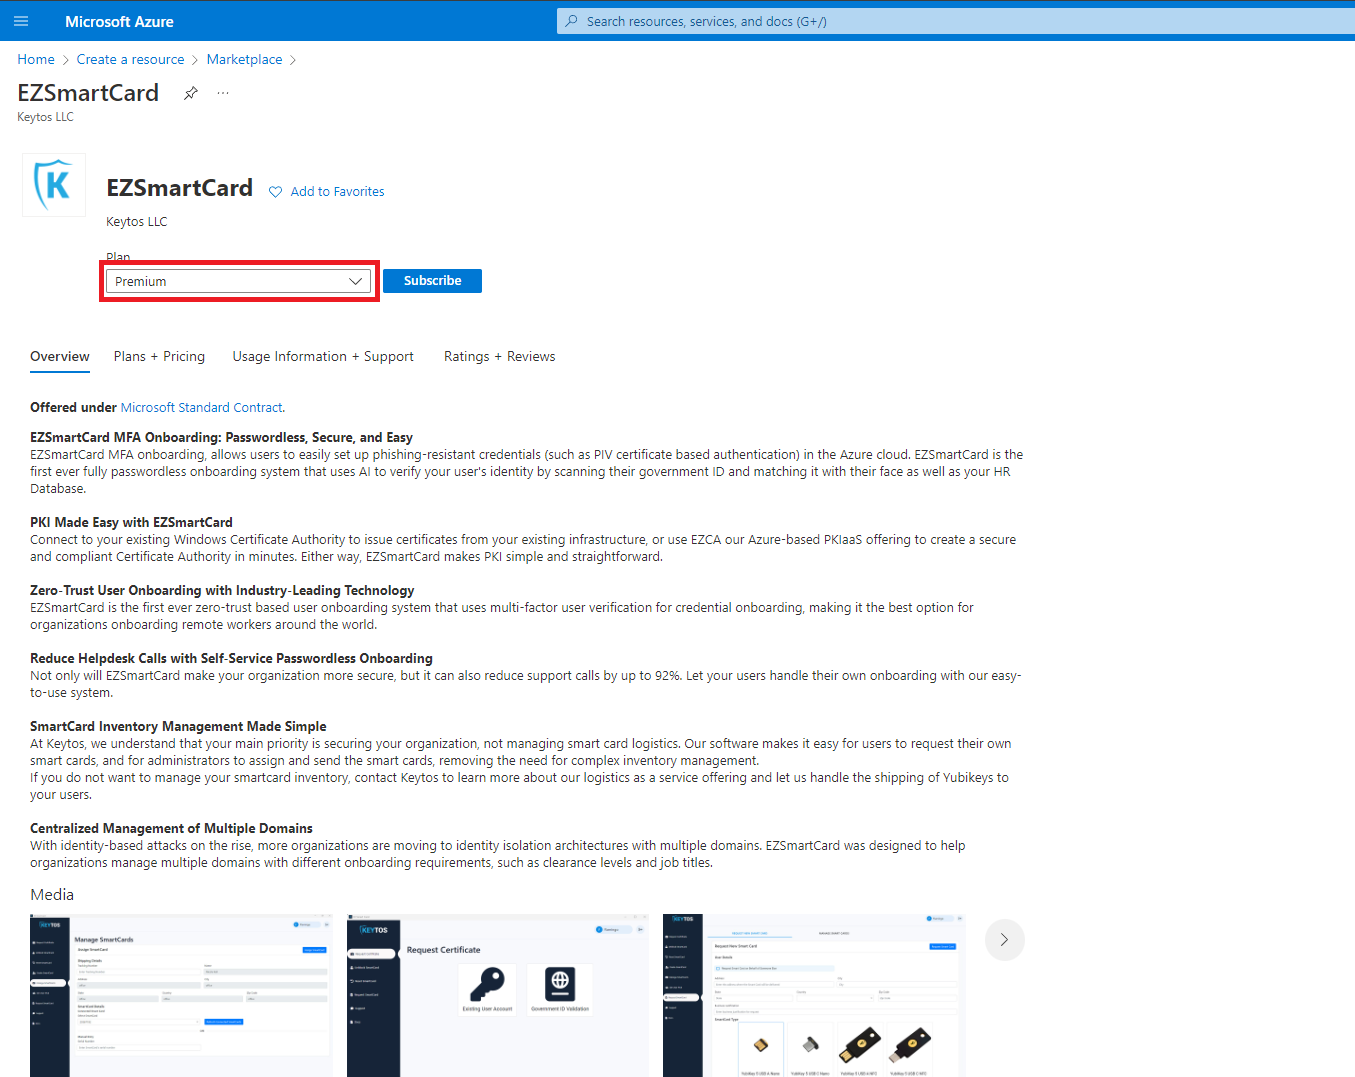
- Click the “Subscribe” button
- Enter your subscription and resource group information.
- Click the “Review + Subscribe” button
- Enter your email and phone number
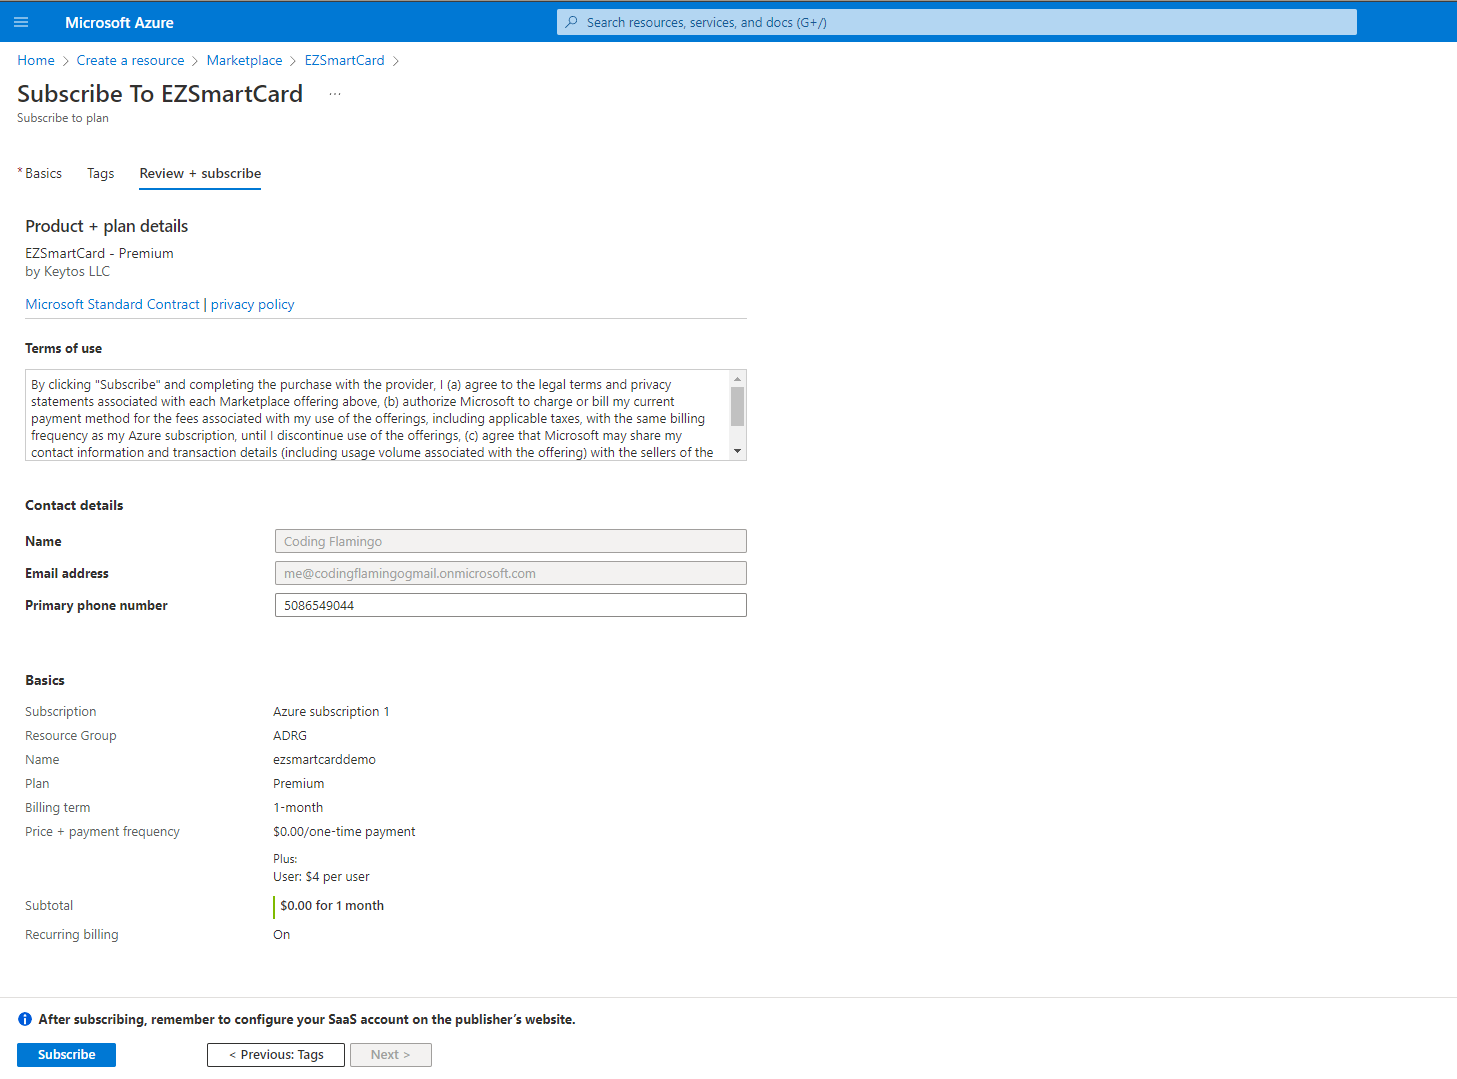
- Click the “Subscribe” button
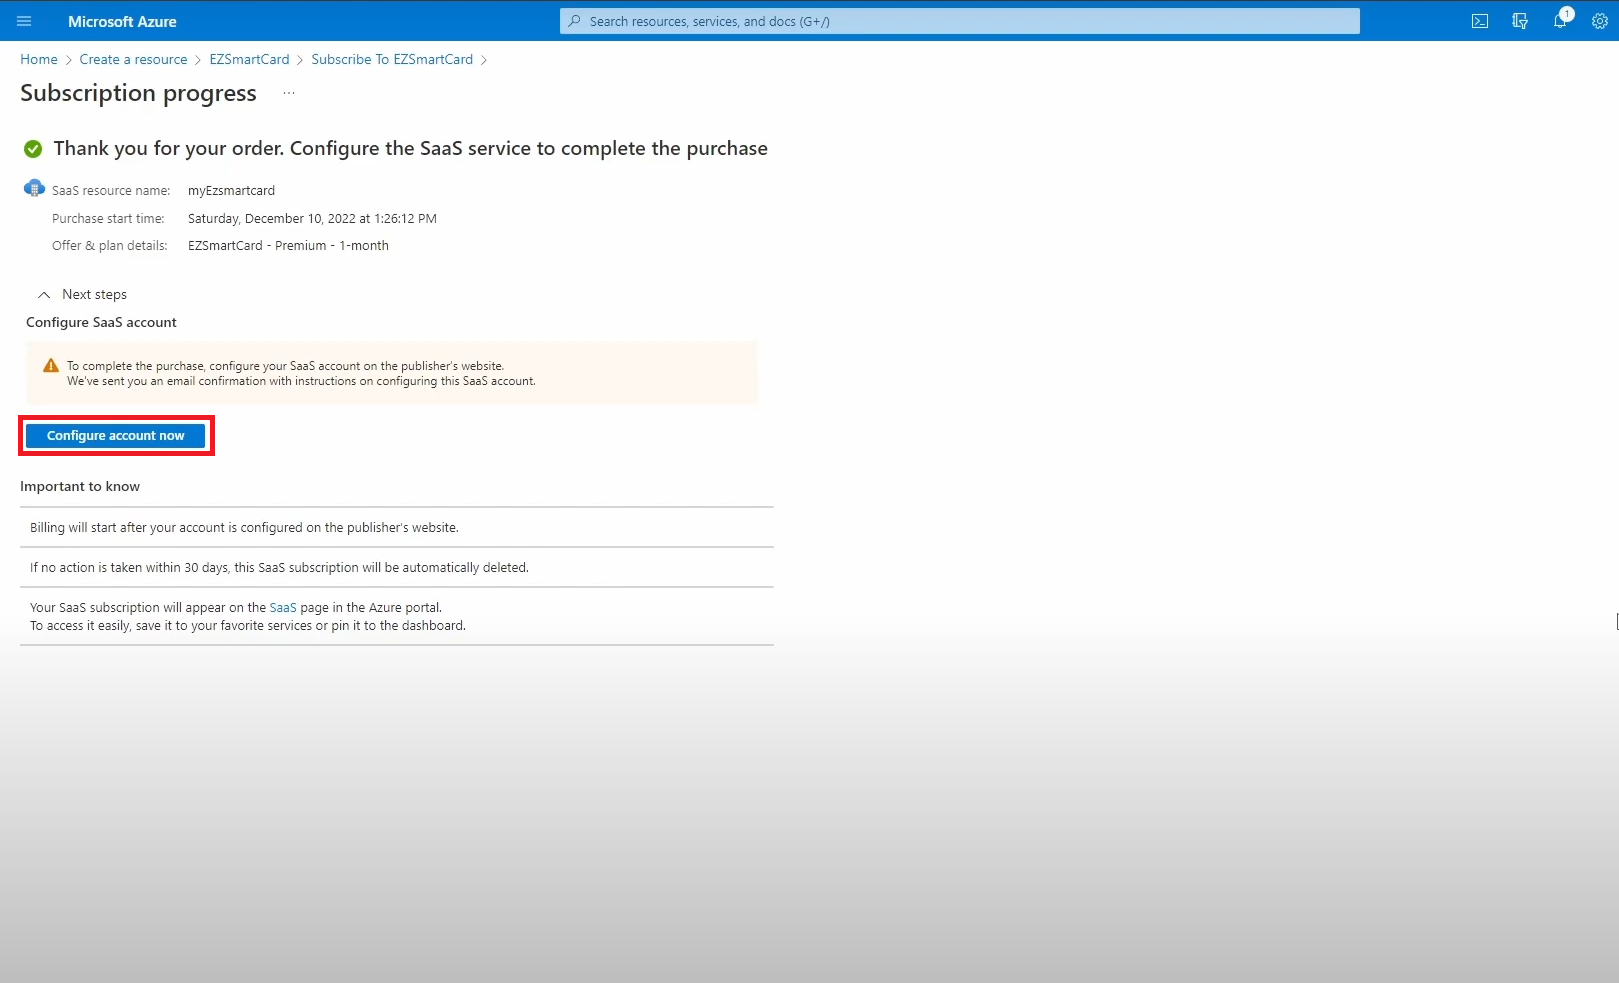
- Once the subscription is complete, click the “Configure account now” button.
- This will redirect you to our portal (https://www.ezsmartcard.io/). Sign in with your same Microsoft account.
- Enter the Sub-domain you want to use for your EZCMS Instance
- Select the Azure Region where you want your resources to be created.
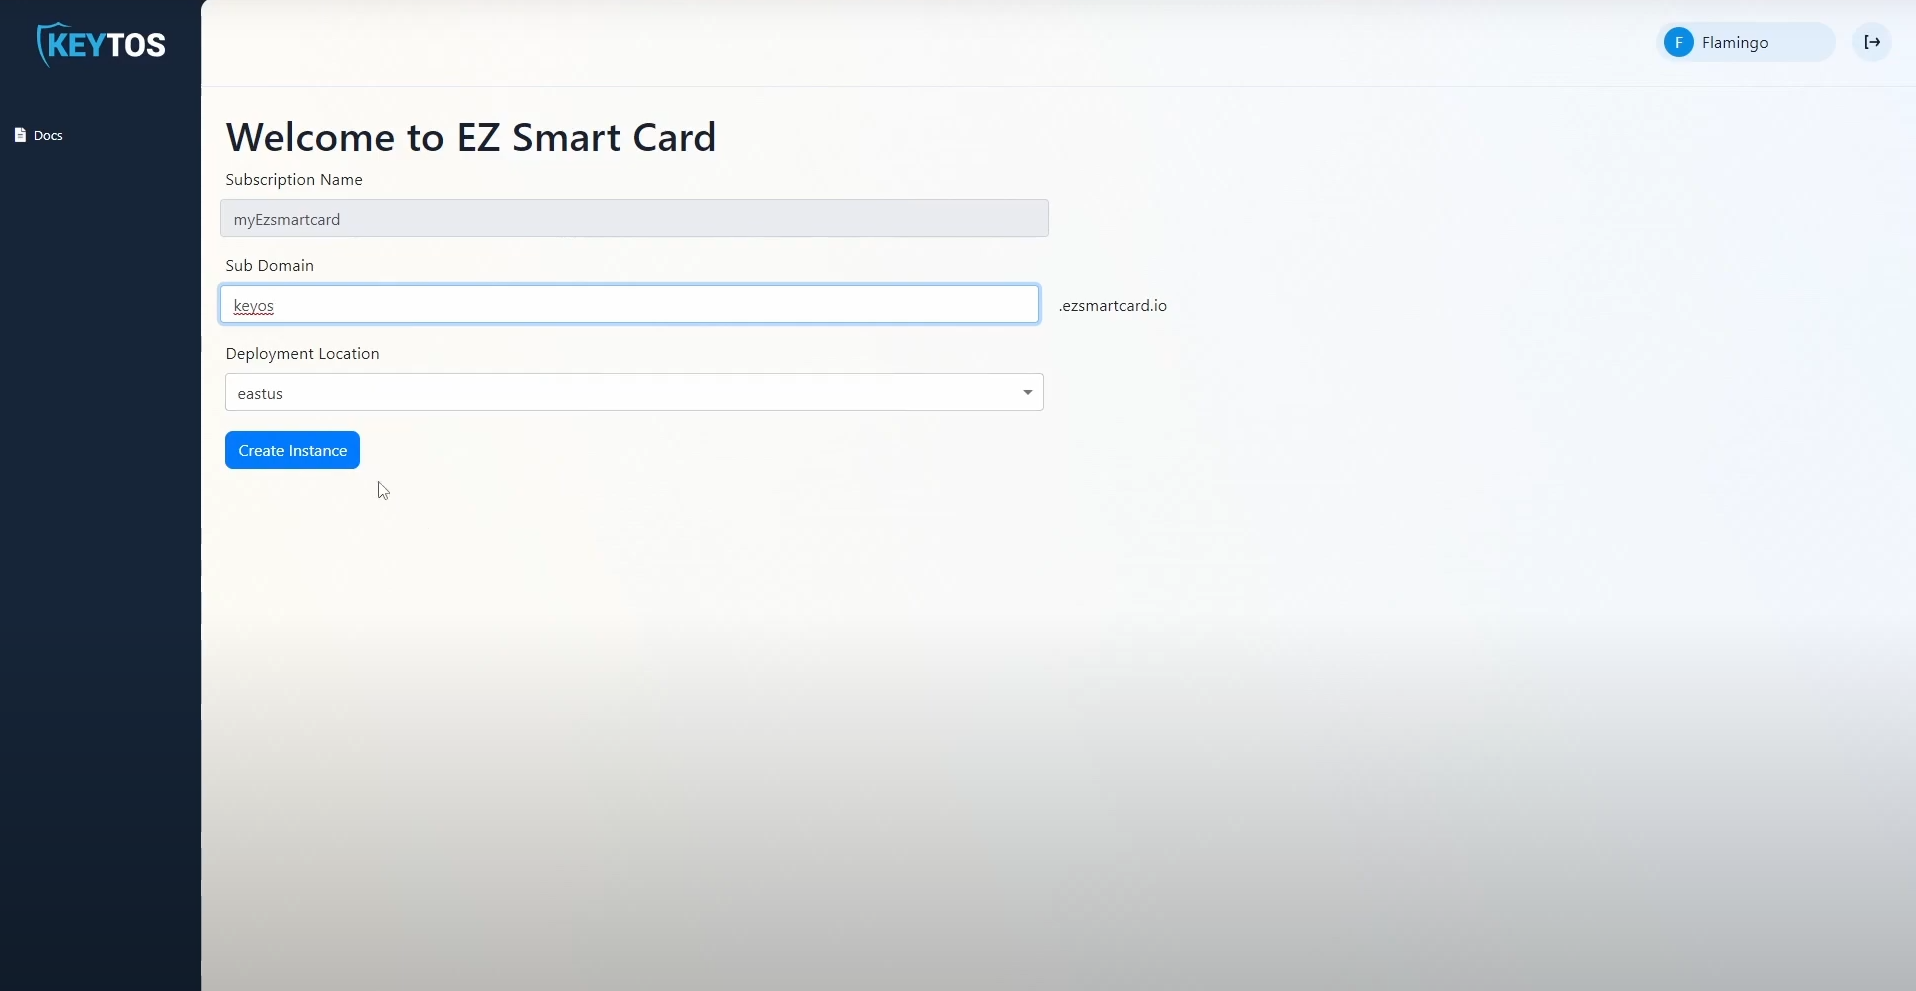
- Once the subscription details are correct, click the “Create Instance” button. This will create your private EZSmartCard instance.
- After 10-20 minutes, your private Azure resources will be created and you can set up your smart card settings